
Due to its excellent compatibility, FAT32 is one of the most commonly used file system formats for USB drives. Many devices such as game consoles, car stereos, and smart TVs only support USB drives formatted in FAT32. However, many users encounter problems when trying to format a USB to FAT32, especially when the drive is larger than 32GB. Don’t worry. Here, we’ll walk you through a full guide on how to format a USB to FAT32 on Mac and Windows.
Can Any USB Be Formatted to FAT32?
Many people often ask questions like “USB won’t format to FAT32, what should I do?” on help sites. In fact, almost all USB flash drives can be formatted to FAT32. If you can’t format USB to FAT32, it’s likely because you’re using the wrong tool. For many years, Windows only allowed USB drives 32GB or smaller to be formatted to FAT32.
This situation has improved in recent versions of Windows 11. Starting with Windows 11 Insider Preview Build 27686 and later, you can format USB drives up to 2TB as FAT32 using the Command Prompt. However, as of now, the standard formatting option in File Explorer still has the 32GB limit. Fortunately, Mac users don’t need to worry about this issue.
One important thing to keep in mind is FAT32’s 4 GB single-file size limit. Even if your USB drive has plenty of storage space, FAT32 is not suitable for storing individual files larger than 4 GB. Now, let’s take a closer look at how to format USB to FAT32 in Windows 11/10!
How to Format USB to FAT32 in Windows 11/10/8/7?
Option A: Use A FAT32 USB Formatter
For most Windows users, the easiest way to format a USB drive to FAT32—especially if it is larger than 32GB—is to employ a professional FAT32 USB formatter. 4DDiG Partition Manager offers a comprehensive disk management solution. With just a few clicks, you can easily format any USB drive to FAT32 or NTFS at no cost. Beyond formatting, the software also allows you to clone an entire USB drive or repair corrupted partitions. The following steps are how to format USB to FAT32 in Windows 11/10:
Step 1: Start by downloading and running the 4DDiG Partition Manager on your Windows machine. Then, plug your pen drive into the same computer and make sure it is detected.
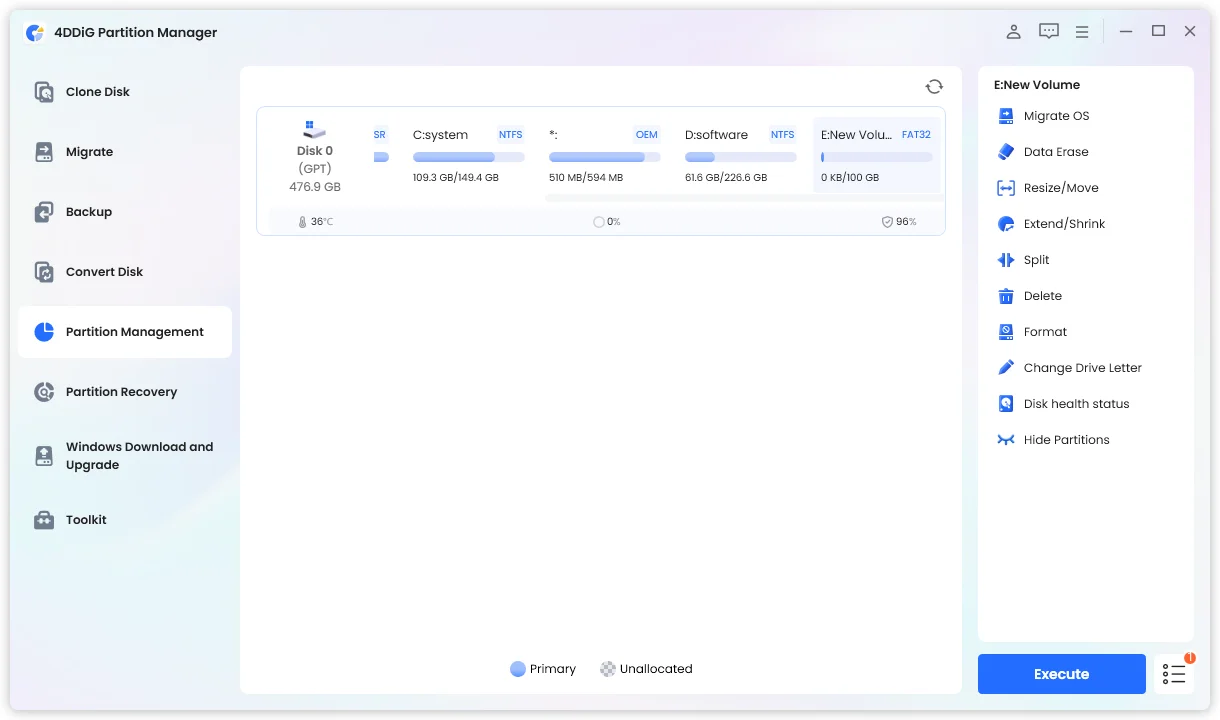
Step 2: In the main interface, go to the Partition Management section. Locate your USB stick, right-click on it and pick the Format option.
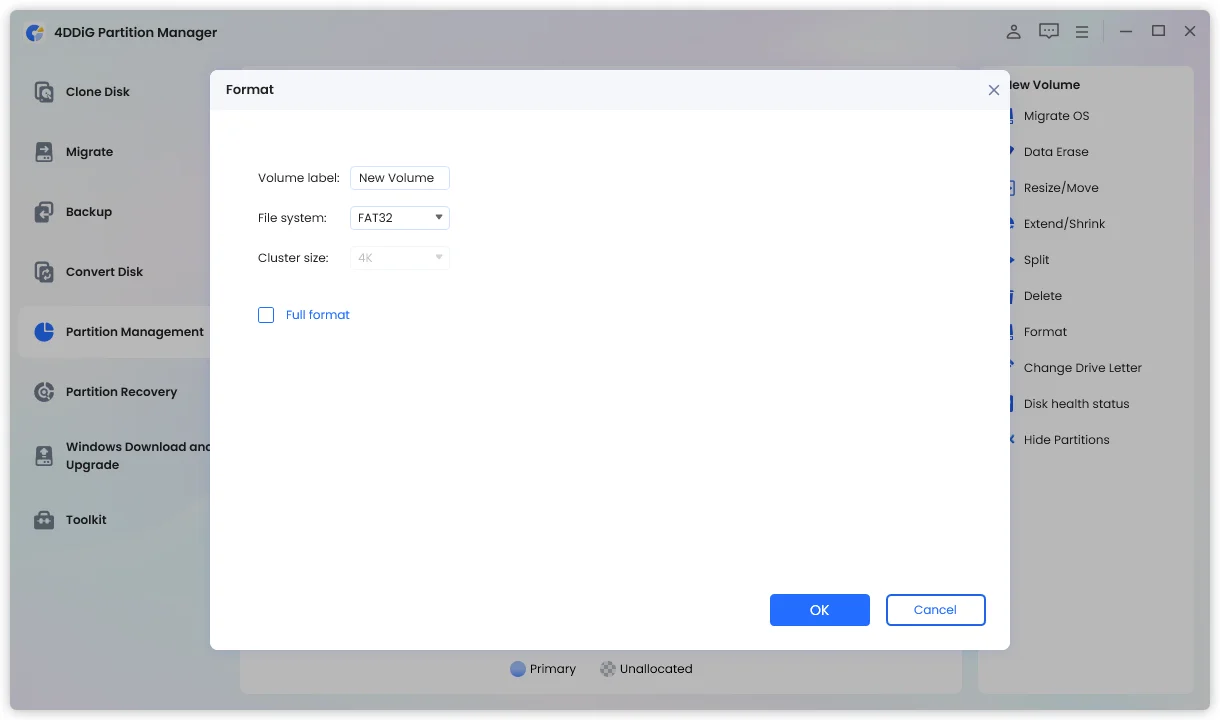
Step 3: Choose FAT32 as the file system. Next, click OK to proceed.
Step 4: Finally, hit the Execute button in the bottom right corner.
Option B: Format USB with File Explorer
File Explorer is a tool that every Windows user is already familiar with, and it provides a straightforward way to format a USB drive. The detailed steps are as follows:
Step 1: First, insert the USB drive into your Windows computer. Press Win + E to open File Explorer.
Step 2: Locate and right-click the pen drive. Select Format.
Step 3: Choose FAT32 from the File system dropdown menu. Click Start, then confirm the warning message to begin formatting.
Option C: Format USB via Command Prompt
The third method is especially suitable for users who prefer not to rely on third-party software. At first glance, the CMD app may seem less user-friendly than graphical tools. However, with a little practice, you will discover how powerful and effective it can be. Here’s a guide on how to use it to format 64GB USB to FAT32:
Step 1: Attach the USB stick to your PC. Open Windows File Explorer, go to This PC, and note the drive letter assigned to your pen drive.
Step 2: Open the Command Prompt app with administrator privileges. Once launched, type and run format E: /FS:FAT32 command. Replace E: with the actual drive letter of your USB drive.

Step 3: Allow the formatting process to be completed. Once finished, dismiss the Command Prompt window. Your USB drive is now formatted to FAT32.
How to Format USB to FAT32 on Mac?
Option D: Format USB through Disk Utility
All versions of macOS include a built-in tool called Disk Utility, which is used to manage internal and external storage devices. Here‘s a little quirk: FAT32 doesn’t actually show up as “FAT32” in macOS. Instead, Disk Utility labels it MS-DOS (FAT), which often confuses Mac users into thinking FAT32 isn’t supported at all.
Here’s an example of how to format USB to FAT32 on Mac with the help of Disk Utility:
Step 1: First, connect the USB stick to your Mac. Once the drive is mounted, launch Disk Utility.
Step 2: After selecting the pen drive, click the Erase button at the top of the Disk Utility window.
Step 3: A new dialog will appear. Enter a name for the USB drive if you wish, then choose MS-DOS (FAT) as the format.
Step 4: Finally, tap Erase to initiate the formatting process.
Option E: Format USB by Terminal
Still looking for how to format USB to FAT32 on MacBook Air? For advanced users, you can use Terminal to get the job done. Whether you use Disk Utility or Terminal, there’s no need to worry about drive size limitations. Follow the steps below to format 64GB USB to FAT32:
Step 1: Make sure the USB drive is connected to your computer. Next, run Terminal from Applications > Utilities.
Step 2: Once Terminal is open, type the diskutil list command and press Enter.
Step 3: Carefully locate your pen drive in the list and note its disk identifier, such as disk1.
Step 4: After that, type and execute diskutil eraseDisk FAT32 USBNAME MBRFormat /dev/disk1.
Conclusion
So, that’s all about how to format a USB to FAT32 on Mac and Windows. In most cases, the built-in tools provided by your operating system are sufficient to complete the task. If those methods fail, you can try using a dedicated FAT32 USB formatting tool. There could be many different reasons why you can’t format a USB to FAT32, such as virus infection, corrupted data, or hardware issues. The size of the USB drive can also matter, so check it first and choose the method that best fits your situation.
FAQ about How to Format USB to FAT32
Q1: Why Is There No FAT32 Option When Formatting USB?
Windows’ built-in formatting tool only shows FAT32 for drives up to 32GB, so larger drives won’t have this option. That’s why many users search for “USB won’t format to FAT32” on Google.
Q2: Should I Format My USB Drive As FAT32 or exFAT?
It depends on how you plan to use your USB drive. For the best compatibility, use FAT32. If you need to store large files (especially over 4GB), exFAT is the better option.
Q3: How Do I Know If My USB is FAT32?
On Windows, right-click your USB in File Explorer, select Properties, and check the File system. On Mac, open Disk Utility, select the USB, and see the Format field—MS-DOS (FAT) means FAT32.